
How to set up DHCP Options (Example with DHCP Option 138 - CAPWAP).
Sometimes, in order to achieve an additional set on features/possibilities, our integrated DHCP-Server solutions offer the possibility of engaging DHCP Options. This tutorial will showcase how to set these up easily!
Walk trough Steps:
- Open the web interface of the designated device, and log in with your admin credentials.
- Go to configuration>Network>Interface>Ethernet>LAN1 and click on advanced settings.
- Under the DHCP extended options click on add.

- Select CAPWAP AC (138), and fill in the Controller IP-address you want to forward the CAPWAP-requests to and click on OK followed by another OK.
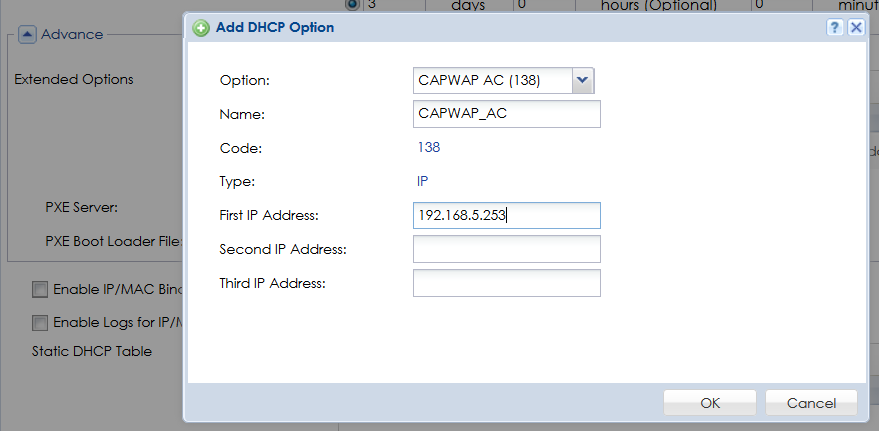
DHCP+CAPWAP requests now should be split, the DHCP will be handled by the USG, the CAPWAP will be redirected to the respective AP-Controller IP defined in the Option 138.
Also interesting:
Do you want to have a look directly on one of our test devices? Have a look here in our virtual Lab:
Virtual Lab - Security Device as AP Controller
Please see the video for more detail:
KB-00058
Comments
0 commentsPlease sign in to leave a comment.